GuvScale - Autoscaling for Heroku worker dynos
I’m happy to announce that GuvScale — our service for autoscaling Heroku background worker dynos — is now available in a public beta.
If you’re using RabbitMQ for distributing work to background dynos hosted by Heroku, GuvScale can monitor the queues for you and scale the number of workers up and down automatically.
This gives two big benefits:
- Consistent processing times by scaling dynos up to meet peak load
- Cost savings by reducing idle dynos. Don’t pay for computing capacity you don’t need
We originally built the guv tool back in 2015, and it has been used since by The Grid to manage their computationally intensive AI tasks. At The Grid we’ve had GuvScale make hundreds of thousands of scaling operations per month, running background dynos at more than 90% efficiency.
This has meant being able to produce sites at a consistent, predictable throughput regardless of how many users publish things at the same time, as well as not having to pay for idle cloud machines.
Getting started
There are many frameworks for splitting computational loads out of your main web process and into background dynos. If you’re working with Ruby, you’ve probably heard of Sidekiq. For Python there is Celery. And there is our MsgFlo flow-based programming framework for a more polyglot approach.
If you’re already using one of these with RabbitMQ on Heroku (for example via the CloudAMQP service), you’re ready to start autoscaling with GuvScale!
First enable the GuvScale add-on:
$ heroku addons:create guvscale
Next you’ll need to create an OAuth token so that GuvScale can perform scaling operations for your app. Do this with the Heroku CLI tool. First install the authorization add-on:
$ heroku plugins:install heroku-cli-oauth
Then create a token:
$ heroku authorizations:create --description "GuvScale"
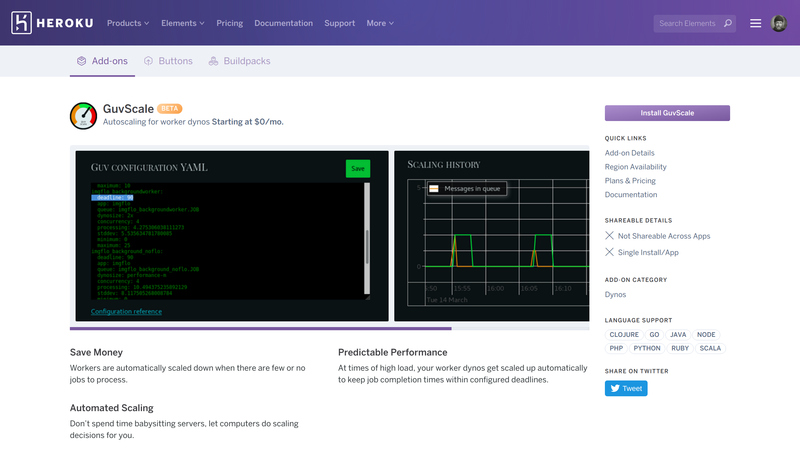
Copy the authentication token, and paste it to the GuvScale dashboard that you can access from your app’s Resources tab in Heroku Dashboard.
Once GuvScale has an OAuth token, it is ready to do scaling for you. You’ll have to provide some scaling rules, either in the GuvScale dashboard, or via the heroku-guvscale CLI tool.
Here is an example for scaling a process that sends emails on the background:
emailsender:          # Dyno role to scale
  queue: "send-email" # The AMQP queue name
  deadline: 180       # 3 minutes, in seconds
  minimum: 0          # Minimum number of workers
  maximum: 5          # Maximum number of workers
  concurrency: 10     # How many messages are processed concurrently
  processing: 0.300   # 300 ms, in seconds
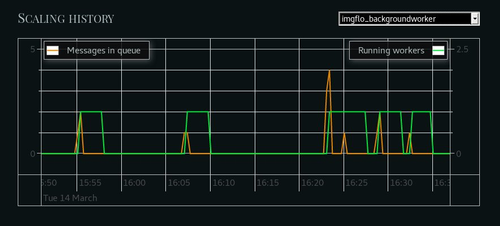
Once GuvScale has been configured you can monitor its behavior in the dashboard.

Read more in the Heroku Dev Center GuvScale tutorial.
GuvScale is free during the public beta. Get started now!
Rescaling 3k images. From 0 servers to 25, back to 0 in <4 mins. 0 humans involved.#devops https://t.co/OSPMZtfrd9 pic.twitter.com/s7Bog4hHLZ
— Jon Nordby (@jononor) June 8, 2016