Running CoffeeScript on Microsoft Azure
It is quite easy to run CoffeeScript applications on Azure now that they support Node.js. You can mostly follow the steps of their Node.js and Express tutorial, with couple of modifications.
Add a package.json into your application root and depend on CoffeeScript and Express:
{

  "name": "myapp",

  "version": "0.0.1",

  "dependencies": {

    "coffee-script": "*",
    "express": "*"
  }

}
Then just have NPM install CoffeeScript by running in the Windows Azure PowerShell for Node.js:
npm install
Once this is done, you can decouple your actual application from the server.js that Azure uses to start your app. The app (in this case, app.coffee) itself could look like this:
http = require 'express'


exports.application = app = http.createServer()

app.get '/', (req, res) ->
  res.send "Hello, CoffeeScript on Azure!"
Note that the application doesn’t start a server, it just exposes it through exports. Starting can happen in server.js:
// Include the CoffeeScript interpreter so that .coffee files will work

var coffee = require('coffee-script');


// Include our application file

var app = require('./app.coffee');


// Start the server

app.application.listen(process.env.port);
And that is it! Now you can work with CoffeeScript just like you would work with any Node.js code on Azure. The only limitation is that if you want to include CoffeeScript files, you need to add the .coffee suffix to the module require call.
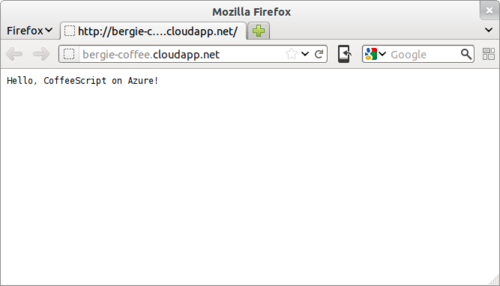
Here is how the deployed application looks (note that deployment can take a long time. My first deployment was about 30 minutes):
For data storage and queue handling, the Azure storage services are exposed through the azure module which is available via NPM or GitHub.
Using Azure workers
With cloud services one important part is to split your application into different functional modules. The web server front-ends should only handle HTTP requests and display data, and any heavier computing should be offloaded to separate workers.
Azure’s Queue feature provides a handy way of offloading tasks to be handled by worker nodes. For example, we could use a queue to send information on every request received on the web front-end so that workers can process it. For this, we need to install the azure module. Add this to the dependencies section of your application:
  "dependencies": {

    ...

    "azure": "*"

  }
Then let NPM install the module:
npm install
Now we can easily work with the Queue service. First initialize a ‘request’ queue in your app.coffee:
# Get the queue service
cloud = require 'azure'
queue = cloud.createQueueService()

# Ensure the queue exists
queue.createQueueIfNotExists 'request', (error) ->
  return unless error
  console.log "Failed to create queue", error
Then start sending information on new requests to the queue by creating a new Express middleware:
# Send URL of each request to queue
app.use (req, res, next) ->
  queue.createMessage 'request', req.url, (error) ->
    return unless error
    console.log "Error sending", error
  do next
Creating a worker
Then we just need to create a worker. It can be initialized using the a PowerShell command:
C:\node\testapp> Add-AzureNodeWorkerRole queue
Now go to the created queue directory, and add a package.json:
{
  "name": "test-queue",
  "version": "0.0.1",
  "dependencies": {
    "coffee-script": "*",
    "azure": "*"
  }
}
Again we’re going to make the actual heavy lifting in CoffeeScript, so change your worker’s server.js to say:
var coffee = require('coffee-script');
var worker = require('./worker.coffee');
Then edit worker.coffee and add the following:
cloud = require 'azure'
queue = cloud.createQueueService()

# Function that receives new requests from queue and outputs them
checkQueue = ->
  queue.getMessages 'request', (error, messages) ->
    return if error

    for message in messages
      console.log message

      # Destroy the message after we've caught it
      queue.deleteMessage 'request', message.messageid, message.popreceipt, (error) ->
        return if error
        console.log "Message #{message.messageid} deleted from queue"

# Poll queue every 0.2 secs
console.log "Setting up queue polling"
setInterval checkQueue, 200
If you deploy now, you should have both a worker and a web server available. In the Azure Emulator you can see all web requests getting logged by the worker.
About pricing
Azure has an interesting pricing model: every running instance costs, and then for storage you have to pay for both the amount of data used, and per transaction.
The polling worker alone, without any requests to the server, would cost 148.50$ per month. Add to that two web front-ends, and say 400 requests per day and you’d be at 208.63$ per month.